Diamond Sharpening Films by Ken Schwartz – in 1×6, 2×6 and 3×8

As knife steels continue to evolve, many of them are becoming more wear resistant than traditional blade steels. While conventional sharpening stones can still sharpen these steels, they often require more time and effort. Diamond abrasives provide another option, and Ken Schwartz Diamond Sharpening Films were developed to offer a complete diamond sharpening progression across a wide range of grit sizes.

Why Diamond Films?

Many sharpeners already use DMT or Atoma diamond plates. These plates are commonly used for repairing damaged edges, removing chips, and establishing new bevels because they remove steel quickly.

Most diamond plates are available up to about 1,200 grit (approximately 7 microns). DMT also offers a 3-micron plate, but many sharpeners transition to diamond pastes or polishing compounds after the coarser plates.

While diamond pastes can further refine an edge, they do not remove steel in the same way as diamond plates. The concentration of abrasive is lower, and although the diamond particles are uniform in size, they generally produce shallower scratch patterns.

The result is a gap between coarse diamond plates and ultra-fine polishing compounds.

A Complete Diamond Progression

Ken Schwartz Diamond Sharpening Films were designed to fill that gap.

Mounted on float glass, the films provide a flat sharpening surface and are available in grit sizes ranging from 165 microns (approximately 100 grit) down to 0.1 micron (approximately 150,000 grit).

This wide grit range allows a complete sharpening progression using the same abrasive type from start to finish.

The films are available in several sizes, including:

Custom sizes are also available for users with specific sharpening systems.

Choosing a Test Blade

To evaluate the sharpening films, I considered using one of my high-wear-resistant knives, including a Rex-121 Mule made by Farid.

Since diamond abrasives can sharpen virtually any blade steel—and even ceramic knives—I decided to use a vintage Torrey wedge straight razor instead.

The razor would provide a clearer view of the scratch patterns under magnification, making it easier to document each stage of the sharpening progression.

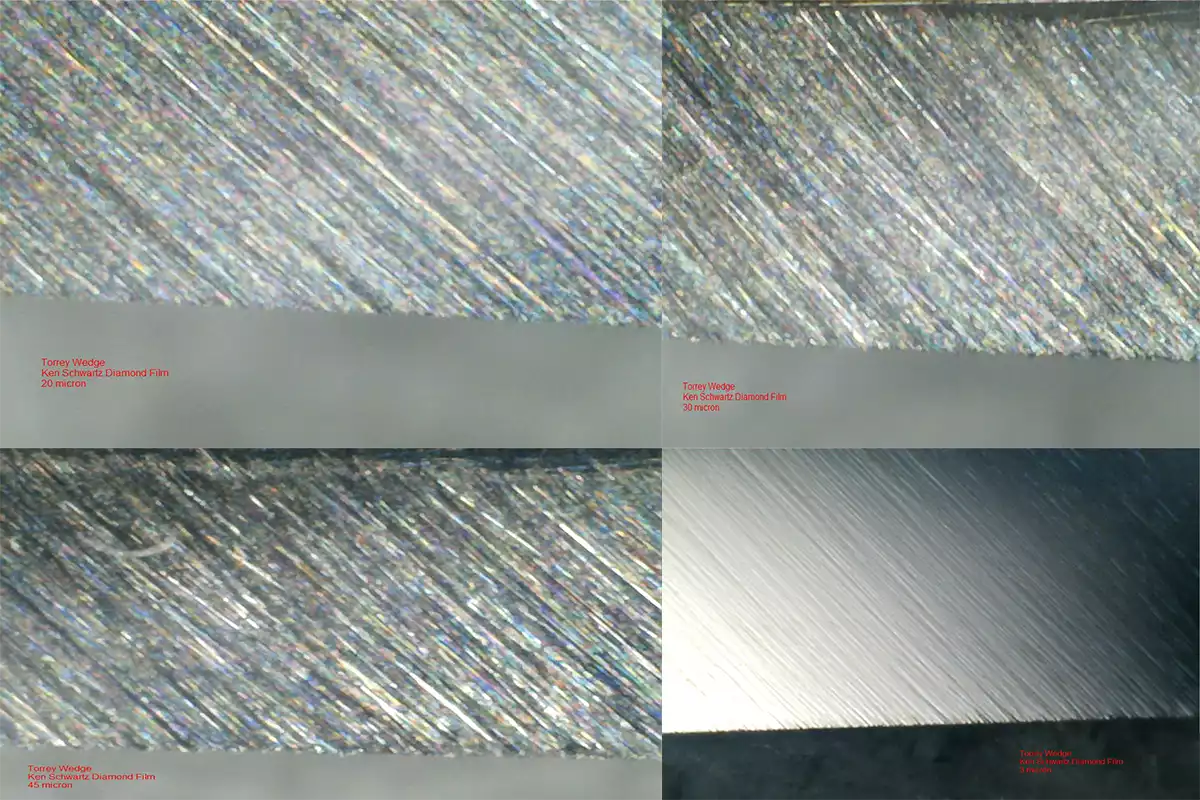
All microscope images were captured using a Veho 400x USB microscope, with each image representing an actual area measuring approximately 0.75 mm high by 1 mm wide.

Starting the Sharpening Progression

The Torrey razor was already in shaving condition, so there was no need to begin with the coarsest 165-micron diamond film.

Instead, I started with the 45-micron (approximately 320 grit) film to refresh and re-establish the bevel.

For this project, I used the 1″ × 6″ Edge Pro size.

This narrow format works well for straight razors because it makes it easier to accommodate blades with smiles, warps, uneven wear, or other variations often found on vintage razors.

In fact, the 1″ × 6″ size has become my preferred format for honing straight razors because it provides better control throughout the sharpening process.

In the following sections, we’ll examine how each diamond film refines the bevel, how the scratch pattern changes from one grit to the next, and what the edge looks like under magnification as it progresses toward a finished shaving edge.

Since the Torrey was already in good shaving condition, I did not need to step back to the 165 micron diamond sharpening film, and opted instead to begin with the 45 micron (320 grit) to re-establish the bevel. I used the 1″ x 6″ Edge Pro size since it makes dealing with warps and other razor-related issues. In fact, I pretty much exclusively use the 1×6 size for honing razors.

1 Torrey 45 Micron Diamond
Torrey 45 Micron Diamond

From the 45 micron film, we can see an edge comparable to the #320 Shapton Pro – a little serrated, but quite consistent.

From here, I progressed to the 30 micron (500 grit) film.

2 Torrey 30 Micron Diamond

30 micron (500 grit) is still quite coarse in terms of razors, but the edge of the edge is already starting to clean up.

Next is the 20 micron (800 grit) film.

3 Torrey 20 Micron Diamond

Again, 20 micron (800 grit) is still quite coarse (and for razors is probably the coarsest grit needed, if at all), but things are looking quite nice. This would be acceptable for a working edge on a knife.

Then onto the 9 micron (1,500 grit) film.

5 Torrey 9 Micron Diamond

I’m completely impressed with the 9 micron film. The edge is looking clean, and the scratches are much more consistent with water stones than diamond plates.

6 micron (3K grit)  is next.

6 Torrey 6 Micron Diamond

As we can see from the difference in the reflective lighting on the bevel, we have entered into the “critical leap” area of the films. There is definite polishing happening at this stage, so we can say the critical leap is between the 9 micron and 6 micron. However, I personally feel it’s between the 6 micron and 3 micron (6K), as we will see below.

7 Torrey 3 Micron Diamond

The reason I would rather call the 6 to 3 micron the critical leap is because of the sheer “flatness” of the bevel off the 3 micron. Either way, at this point we are certainly sharp, and headed toward the land of shaving!

The 1 micron (15K) film is next.

8 Torrey 1 Micron Diamond

Although the edge of the edge is certainly consistent and able to shave,  we begin to run into some razor-related issues. This picture is reminiscent of the 16K Shapton Glass post I did a while back, where the Swedish steel was quite brittle, and began to chip out as the steel got thinned beyond it’s capability. That has much more to do with the characteristics of the steel, and NOT the quality of the diamond films.

9 Torrey half Micron Diamond

Here we can see the 0.5 micron (30K grit) film is pushing the limits of the Torrey, however,  the bevel itself is quite clean.

Since I was also testing a progression of Ken Schwartz’s diamond sharpening films for a razor customer, I switched here to finish the razor on Ken Schwartz’s 0.125 micron CBN on balsa instead of going to the 0.1 diamond film, as was requested.

Conclusion

Obviously, the diamond films work, and they deliver in full from coarse to ultra fine grits. You also don’t need super hard steels in order to use or benefit from the diamond films, and since we are dealing with diamond abrasives, you get much longer cutting action out of them than conventional sand paper. Ken Schwartz has hit a home run in my book!

By the way, the shave was wonderful 🙂

5 thoughts on “Diamond Sharpening Films by Ken Schwartz – in 1×6, 2×6 and 3×8

  1. Tom you are killing my wallet! If it weren’t for you I would be perfectly happy with my 1micron finish. But no, you just had to go there. 🙂

    1. Sorry about that, Mark! 😛
      1 micron is great, and more than enough for most applications, so you don’t need anything finer most of the time….but we all secretly want it! 😀
      Thanks for reading!

  2. Pingback: Knife Sharpening
  3. Hey! This is my first comment here so I just wanted to give a quick shout out and say I genuinely enjoy
    reading through your posts. Can you recommend any other blogs/websites/forums that cover the same subjects?
    Thanks!

  4. this blog makes for VERY interesting reading, especially the use of diamond films. i sharpen professional hairdressing scissors and will have to look into this. at present my best edges are the result of a 8k-12k Kitayama whetstone on the inside ride of the blades but the fine grit diamond films will push this to new limits
    God bless
    gabriel
    south africa

Leave a Reply

This site uses Akismet to reduce spam. Learn how your comment data is processed.

Discover more from Jende Industries Blog

Subscribe now to keep reading and get access to the full archive.

Continue reading