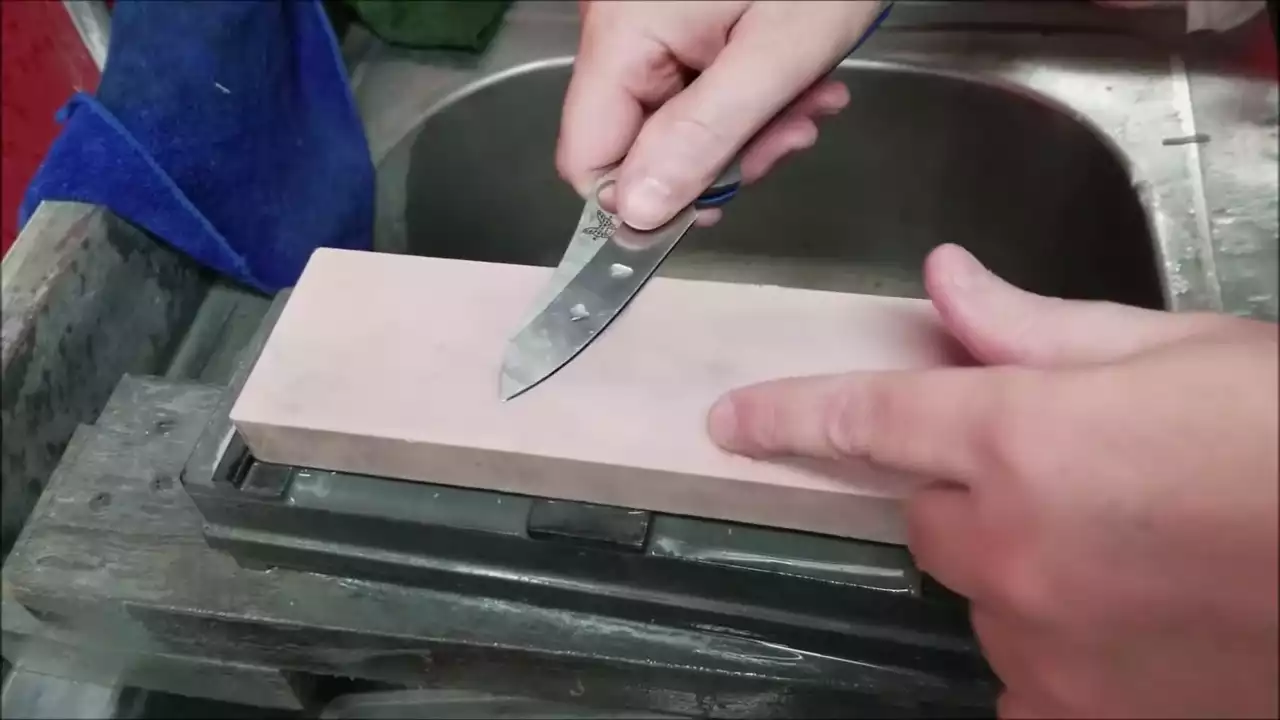
Freehand sharpening a radius tip on a most knives takes more strokes than just the straight flat section of the blade because only one small point touches the stone at a time. A good way to match the curvature without changing the angle or position of the blade is to lift the handle up by using your elbow in order to match the curve.
Okay, so I’m gonna show you about the tip. This doesn’t have a huge radius, but I just want to show you what I meant about that. So basically I marked it with a Sharpie. That’s alright. Here we go. It’s black.
Anyway, so what we’re gonna do is on the other side as well. So of course find your angle. Put a little water down here.
So here is, obviously see how much straighter that is from here to here. And then we have this curvature. So this is, when you’re doing the the bulk from the heel to sort of mid section the belly area, it’s not a big deal. That’s pretty flat, pretty straight. There’s very little curvature to it, depending on the knife and and the curve and the belly. So I’m really only working that there.
And you can see the black stops right there. So that’s pretty much the straight area. So then we got to get the curvature. So this is where you’re pretty much hitting this is not a 360 degree, but we’re trying to basically match that. So if you go straight like we’re doing here, and just do forward here, I’m not hitting the tip. I have to roll that. So that’s the only way to do it. So when you’re rolling it, you only get a limited amount of exposure to the stone. You can see the black ink coming off already as you’re doing it. But as you curve, you just have a very minimal amount of time.
Whereas on the belly part you’re doing the whole stroke is hitting the stone. So on the curve, you literally have to do like 10 times as much. I don’t think 10 is the actual number, but more so to match that radius. You can see I’ve taken off fairly quickly with good angles there.
And then what you want to do at the end is come back, find your angles, and then follow through on one stroke. Forward, here I got the belly, I’m really looking at the heel, working my way through and then coming towards the tip. Okay.
Basically the stroke then, I’ve switched stones with no big deal. Same process. The belly here. So what you’re gonna do is come around and the stroke is, you can see the streak that was left. So you have this huge area here touching, and then that little streak right there was, that’s how little it touches the edge.
So when you’re coming through on your stroke you can follow through straight and flat, curve. Straight and flat, curve. You can do, you know, a couple more on the curves, as long as you get that, you can see my lines as I’m doing this. That’s why it takes usually more because you’re not hitting that whole flat area at all times. You’re hitting one little spot at a time along along the radius.
So same thing when you’re flipping it over, if you’re gonna do this way, or if you’re switching hands, whatever you’re gonna do. So, same thing. So the process is the same on both sides. Just get that curvature going however you’re gonna do it.”
Knife: Benchmade CPM20CV
Stones: 600 Naniwa Bubble Gum, 1K Naniwa Goken Pro